Hey there!
Welcome (back)! In this article I’m sharing a walk through implementing a simulation for a ‘Soft Body’. According to wikipedia Soft-body dynamics is a field of computer graphics that focuses on visually realistic physical simulations of the motion and properties of deformable objects) (or soft bodies).[[1]](https://en.wikipedia.org/wiki/Soft-body_dynamics#cite_note-1)
In this article we will go through reviewing an implementation from Daniel Shiffman using the Toxic Library, and then translating an example from MatterJS into P5JS. We will also expand the matterJS example in order to deal with custom made structures and custom shapes and moreover be able to understand the physics and theory behind these simulations.
- review the example from Daniel Shiffman’s Coding Trainin order to understand better what’s going on behind a Soft Body System. (Part 1)
- implement a Soft Body System using the Toxic Library (Part 1)
- we will implement the Soft Body example from MatterJS into P5JS in order to be able to kick start our own systems and experiments(Part 2)
- we will also explore creating a custom shaped Soft Body (Part 3)
- and last we will focus on detecting the edges of a cluster using theConvex Hull Algorithm and writing a function for JS (Part 3)
Getting Started: Understanding Shiffman’s approach
To build a solid foundation, we’ll begin with Shiffman’s example of a Soft Body system. This will help us understand the basics before diving deeper into Matter.js and p5.js.
Before diving into our custom soft body simulations, let’s take a step back and explore Daniel Shiffman’s Soft Body example from his Coding Train series. His example provides an introduction to the concept by combining simplicity with creative physics-based interactions.
Shiffman uses Spring Forces and Particle Systems to simulate a soft body and he uses the springs and particles, as well as the physics engine available inside the Toxic Library.
Here’s a breakdown of how his approach to the Soft Body System works and the key ideas we’ll build upon:
Key Components in Shiffman’s Approach
Particles Represent the Soft Body Nodes
Each point in the soft body is represented as a particle with properties like position, velocity, and acceleration. These particles are treated as independent entities that react to external forces like gravity, friction, drag, and user interactions, and internal forces like inertia, mass, stiffness.
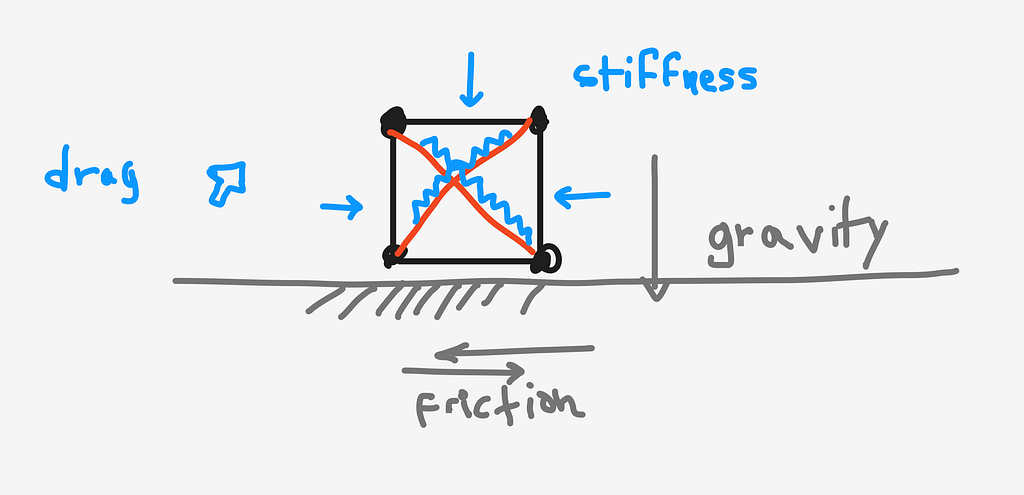
Well in the case of Daniel Shiffman’s Charatecter example, the character is not affected by gravity, but it is affected by the screen boundaries, its own stiffness through the springs connecting the particles in the system and the drag from the user interaction via the mouse.
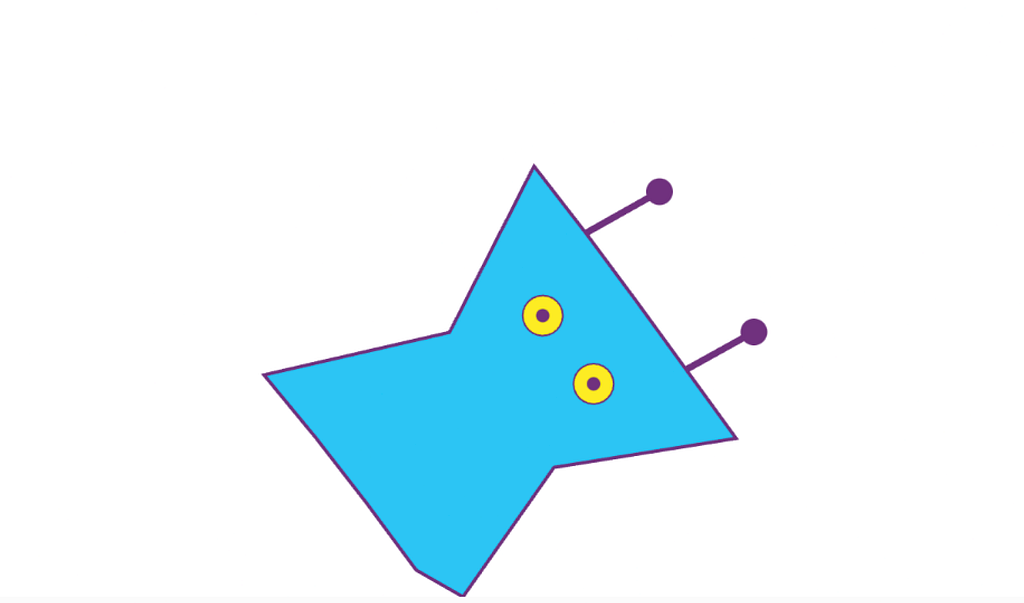
Spring Forces Connect the Particles
Shiffman links the particles using virtual “springs.” Each spring creates a force that pulls the connected particles toward their original distance. This creates the elasticity needed for soft body behaviour. Like this, the body maintains a structure with some level of elasticity. Thus, the body can rotate, squeeze, bounce in relation to the environment, and itself. In his version he doesn’t go deeper into collisions with other Soft Bodies, but only with the boundaries of the environment.
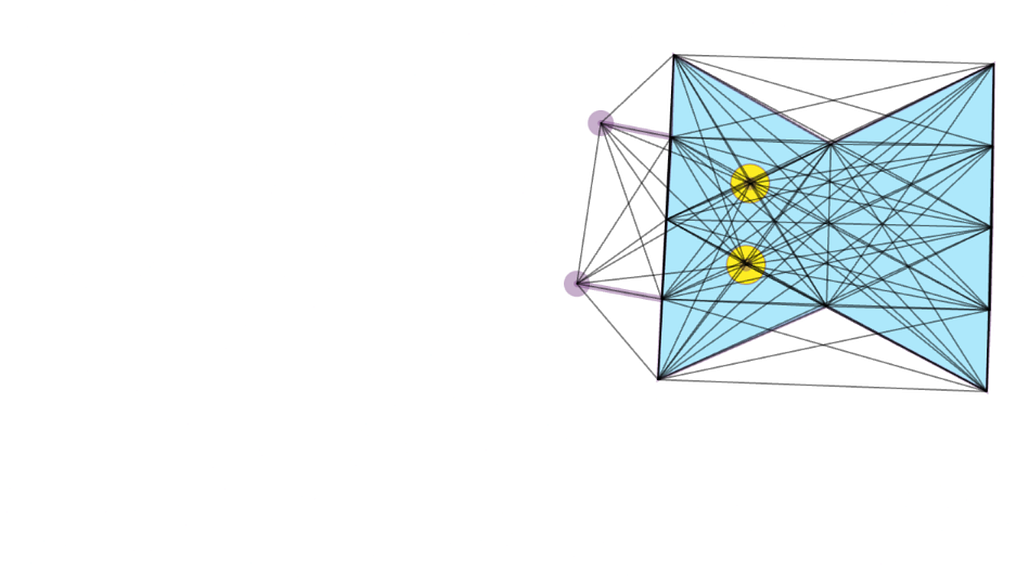
If we observe the wires connecting the particles in the implementation from Shiffman we observe that a lot of lines connect the particles. These can be understood as springs which hold the particles together. A combination of tension and compression forces interact across such a system. In the following diagram you can see what’s going on behind the scenes. The particles are entangled with lines which behave like springs. These springs keep the particles together and in the relative same postion. The whole soft body can rotate, move in space, bounce, squeeze. The overal position and orientation of the body may variate considerably. If there were no boundaries the Soft Body could just keep on floating in space for the eternity, and very fast away from our screens. However, thanks to the magic of Springs, the Particles within the Soft Body system are able to maintain the same position in relation to each other.
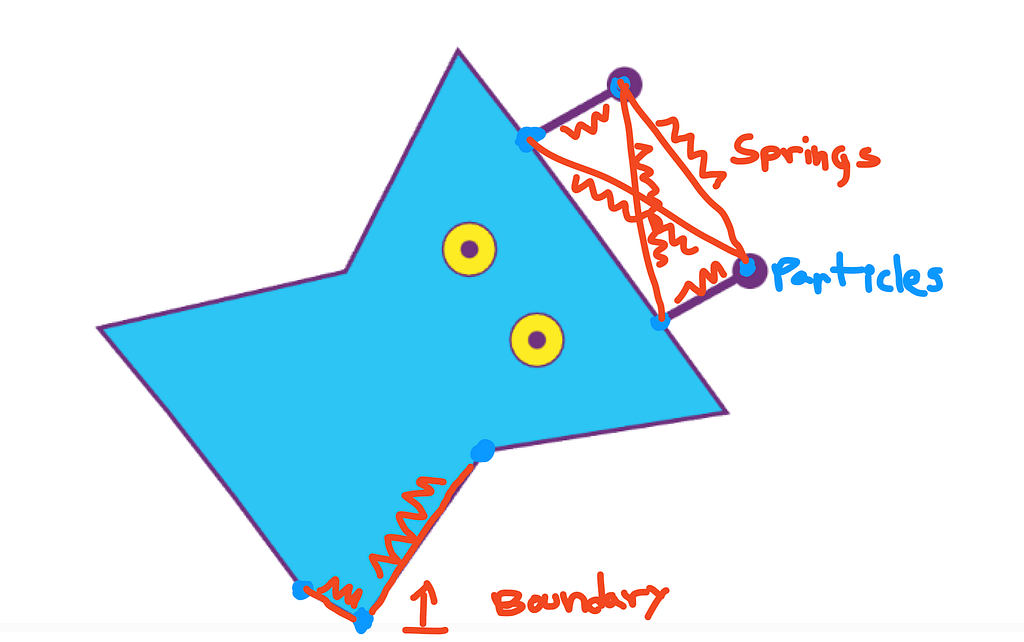
You can access Dan’s lesson here and the sketch on the p5js editor here. Remember hitting the space bar to swap between normal view and view with the springs.
I adapted his approach to make an example that will be closer to the Soft Body Example from MatterJS which we will look at in the next article. We will call this the Toxic Soft Body
A Scaffolding Soft Body System with the Toxic Library
Ok, to not make the story too long we will use the Toxic Library to save some time in developing, explaining and managing the Physics behind the behaviour of this system. *Toxiclibsjs** is an open-source library for computational design tasks with JavaScript. *It is based on Newtonian Physics and Vector Statics or Mechanics. If you want to know and understand more about Vector Mechanics and applied newtonian physics into code take a look at this explanation and at Shiffman’s approach to newtonian physics and forces in p5js.
Well the Toxic Library includes classes such as particles, springs, physics system/engine, WorldBoundaries, etc. This makes our life easier as we don’t need to code everything from scratch, while we are still able to understand the underlying elements and manipulate them to accommodate to our needs and design.
In my case, I will borrow some base implementation from the Soft Body Character, to build the Toxic Soft Body Structure. The ‘design’ of this structure is simple, it will be a rectangular scaffolding and to add a bit of playfulness, I will display a ‘letter’ using our Sooft Studio logo, as it is becoming tradition : ‘S,O,O,F,T’. (Access the sketch at the p5 js editor).
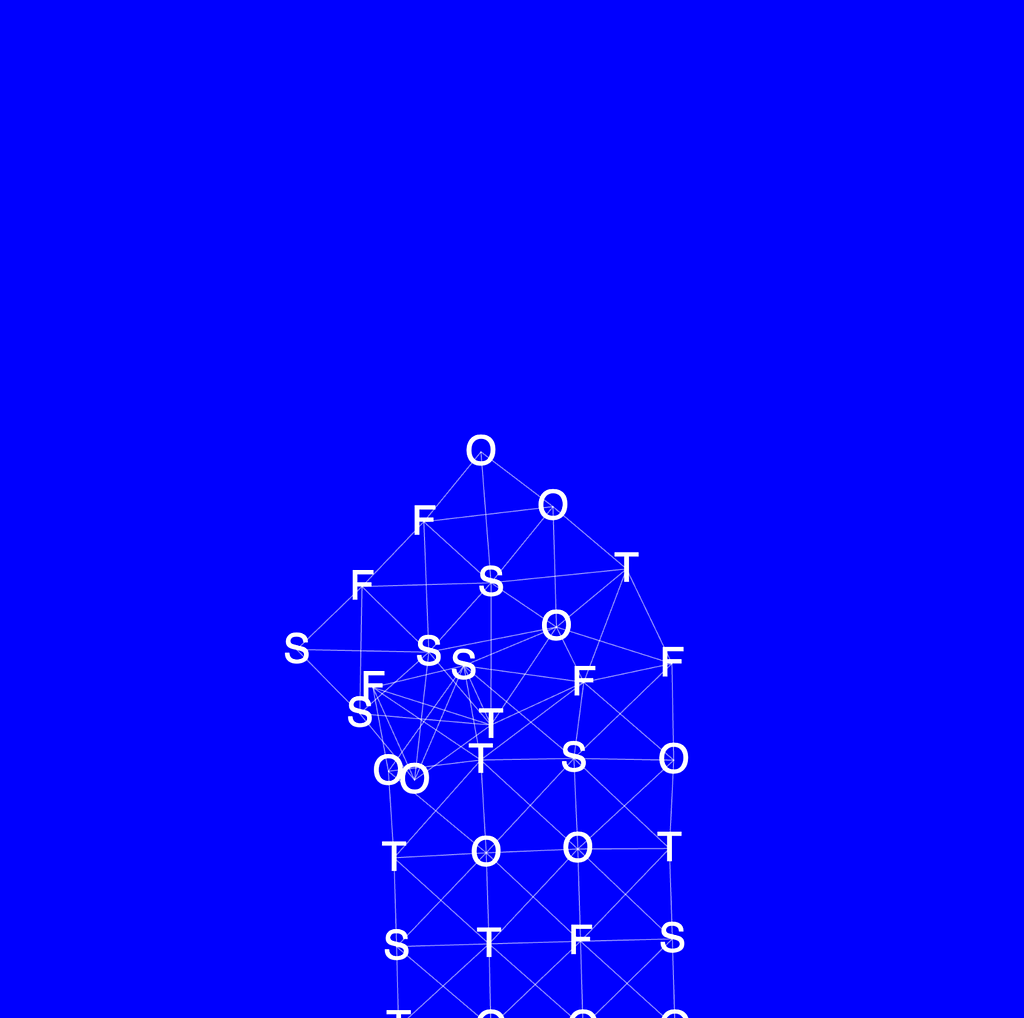
Alright, first let’s load all the elements we need in order to have the Toxic lib working. In your index.html at the HEAD, add a <script> with the src pointing to an updated and working version of the toxiclibjs. In my github repo example the toxiclib is locally there to be able to run the sketch offline.
```
<script src="https://cdn.jsdelivr.net/gh/hapticdata/[email protected]/build/toxiclibs.js"></script> ```
Now inside the sketch.js let’s start by writing somethings down. Let’s declare the base elements for the Toxiclib to work with.
```
const MAX_SPEED = 50; // Define your maximum speed here const { VerletPhysics2D, VerletParticle2D, VerletSpring2D } = toxi.physics2d; const { GravityBehavior } = toxi.physics2d.behaviors; const { Vec2D, Rect } = toxi.geom;
let physics; // our particles array containing the points/joints in the structure let particlesf = []; // our springs array containing the strings (tensor-compressor) connecting the joints let springs = []; // defining the shape of the scaffolding 8 rows, 4 columns let rows = 8; let cols = 4; // defining the space between particles -> 80 let spacing = 80; // this variable will allow for selecting and locking the position of a particle with the mouse let selectedParticle = null; // and this string will be then broken down into an array containing the letters of sooft studio let letters = "S,O,O,F,T" ; ```
Note that this MAX_SPEED will handle the maximum speed at which particles can be accelerated to constrain it so that we do not over accelerate them and turn our sketch into chaos.
Now we can start writing down the following things:
- our setup function: will contain all the parameters and declarations of our particles and the respective springs
- our draw function: will contain all the update loops and visual loops, and handle the mouse interaction
- a class extension for the particles existing already in toxiclibs in order to pass some parameters and add some custom behaviour
- a class extension for the springs, for the same reasons as the previous class extension
- two custom functions to apply repulsion and constrain particles’ velocities
Before jumping into the the setup function here a diagram to understand how the Soft Body Scaffolding works. In the illustration bellow, we can see that the particles are interconnected with springs, which allow the particles to maintain their relative positions and distances with dynamic forces of tension and compression.
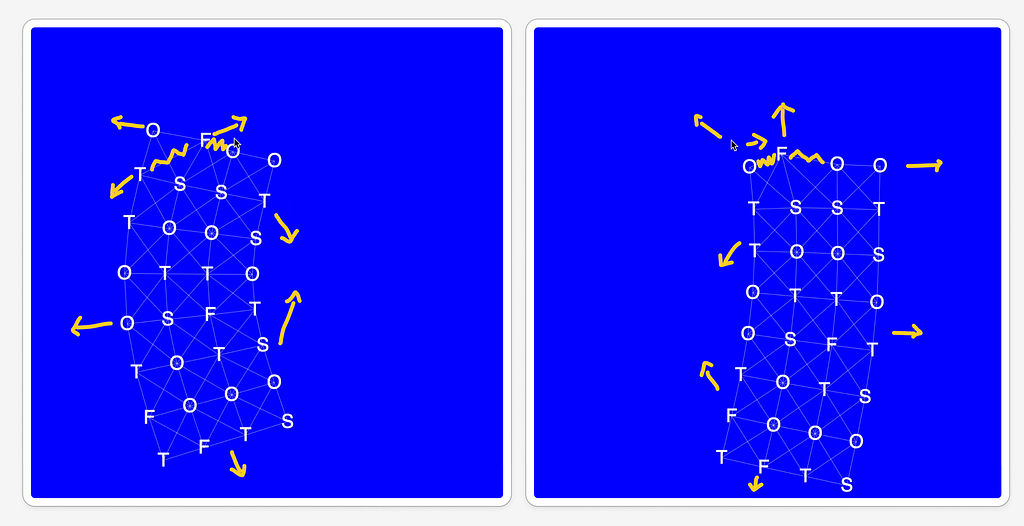
Thus in the setup function we will initialise the particles, the springs, their parameters and the world physics engine. We will use the row and cols variable, as well as the spacing and we will fill in the particles and the springs arrays.
``` function setup() { createCanvas(900, 900); letters = letters.split(","); // explodes the string into an array with the letters. we can also just write the array directly and spare this step //console.log(letters); // Initialize physics physics = new VerletPhysics2D(); let bounds = new Rect(0, 0, width, height); physics.setWorldBounds(bounds);
// Add gravity to the system -> 0.75 is rather stron gravity. // the bigger the gravity the heavier the object. try out playing with bigger numbers physics.addBehavior(new GravityBehavior(new Vec2D(0, 0.75)));
// Create a grid of particles for (let y = 0; y < rows; y++) { for (let x = 0; x < cols; x++) { let particle = new Particle(100 + x spacing, 50 + y spacing, false); particlesf.push(particle); } } // Connect particles with springs for (let y = 0; y < rows; y++) { for (let x = 0; x < cols; x++) { let i = x + y * cols; // Right neighbor if (x < cols - 1) { springs.push(new Spring(particlesf[i], particlesf[i + 1])); } // Bottom neighbor if (y < rows - 1) { springs.push(new Spring(particlesf[i], particlesf[i + cols])); }
// Diagonal neighbors if (x < cols - 1 && y < rows - 1) { springs.push(new Spring(particlesf[i], particlesf[i + cols + 1])); } if (x > 0 && y < rows - 1) { springs.push(new Spring(particlesf[i], particlesf[i + cols - 1])); } } } } ```
That’s it. it is that simple. Now let’s focus on the draw loop. It is really simple. We only need to call the physics.update(); function from the toxiclib Physics object.
We then iterate through the arrays of springs and particles to call their respective show() methods. For this we use the shorthand format from the forEach function:
- springs.forEach((spring) => spring.show());
- particlesf.forEach((particle) => particle.show());
Finally, we handle the mouse interactions by using the public variable selectedParticle, and the public boolean from p5 inside an if loop to detect when the mouse is pressed: mouseIsPressed. During the first loop when mouse is pressed, we lock the selectedParticle, when mouse is not pressed we release the locked particle and set the selectedParticle to null.
``` function draw() { background(0, 0, 255); // Update the physics system physics.update(); // Draw springs springs.forEach((spring) => spring.show()); // Draw particles particlesf.forEach((particle) => particle.show());
// Handle mouse interaction if (mouseIsPressed) { if (!selectedParticle) { // Find the nearest particle on mouse press //let particlesT = particlesf.concat(particles2); // in case we would build a second body particles2 we can concatenate both to interact with the mouse // selectedParticle = particlesT.reduce((nearest, p) => { // in case two bodies particlesT instead of particlesf selectedParticle = particlesf.reduce((nearest, p) => { let d = dist(mouseX, mouseY, p.x, p.y); return d < dist(mouseX, mouseY, nearest.x, nearest.y) ? p : nearest; }, particlesf[0]); } // Move the selected particle selectedParticle.lock(); selectedParticle.x = mouseX; selectedParticle.y = mouseY; selectedParticle.unlock(); } else { selectedParticle = null; // Reset when mouse is released }
} ```
NOTE: that in JS the forEach will not iterate through the Array in a linear way(from 0 to length-1 of the array), rather it iterates in the most optimal way at hand. In this case this doesn’t affect us, but other cases when you use incremental related functions inside the for loop this could be a problem.
Finally, we will write our classes’ extensions for Particle and Spring.
```
// Particle class extension class Particle extends VerletParticle2D { constructor(x, y, fixed = false) { super(new Vec2D(x, y)); this.r = 6; if (fixed) this.lock(); // Lock fixed particles physics.addParticle(this); this.ltt = letters[int(random(0, letters.length))]; //console.log(this.ltt) }
show() { fill(255); //stroke(255); //ellipse(this.x, this.y, this.r * 2); textAlign(CENTER, CENTER); textSize(35); text(this.ltt, this.x, this.y); } }
// Spring class extension class Spring extends VerletSpring2D { constructor(a, b) { let length = a.distanceTo(b); // Rest length is the initial distance super(a, b, length, 0.08); // Strength of the spring physics.addSpring(this); }
show() { stroke(255, 127); strokeWeight(1); line(this.a.x, this.a.y, this.b.x, this.b.y); } } ```
Note that we use super() in the constructor method from the extension class. This, in simple words, invokes the parameters from constructor from the parent class. You can find a deeper explanation on that here if you are not familiar with the super() method inside classes’ constructors.
Also note that the stiffness is modified inside the Spring class. Think that stiffness could also be variable for each particle. Feel free to experiment with this.
Great, now we are ready to run our sketch. Try it out. Here all the pieces together which we wrote so far:
```
const MAX_SPEED = 50; // Define your maximum speed here const { VerletPhysics2D, VerletParticle2D, VerletSpring2D } = toxi.physics2d; const { GravityBehavior } = toxi.physics2d.behaviors; const { Vec2D, Rect } = toxi.geom;
let physics; // our particles array containing the points/joints in the structure let particlesf = []; // our springs array containing the strings (tensor-compressor) connecting the joints let springs = []; // defining the shape of the scaffolding 8 rows, 4 columns let rows = 8; let cols = 4; // defining the space between particles -> 80 let spacing = 80; // this variable will allow for selecting and locking the position of a particle with the mouse let selectedParticle = null; // and this string will be then broken down into an array containing the letters of sooft studio let letters = "S,O,O,F,T" ;
function setup() { createCanvas(900, 900); letters = letters.split(","); // explodes the string into an array with the letters. we can also just write the array directly and spare this step //console.log(letters); // Initialize physics physics = new VerletPhysics2D(); let bounds = new Rect(0, 0, width, height); physics.setWorldBounds(bounds);
// Add gravity to the system -> 0.75 is rather stron gravity. // the bigger the gravity the heavier the object. try out playing with bigger numbers physics.addBehavior(new GravityBehavior(new Vec2D(0, 0.75)));
// Create a grid of particles for (let y = 0; y < rows; y++) { for (let x = 0; x < cols; x++) { let particle = new Particle(100 + x spacing, 50 + y spacing, false); particlesf.push(particle); } } // Connect particles with springs for (let y = 0; y < rows; y++) { for (let x = 0; x < cols; x++) { let i = x + y * cols; // Right neighbor if (x < cols - 1) { springs.push(new Spring(particlesf[i], particlesf[i + 1])); } // Bottom neighbor if (y < rows - 1) { springs.push(new Spring(particlesf[i], particlesf[i + cols])); }
// Diagonal neighbors if (x < cols - 1 && y < rows - 1) { springs.push(new Spring(particlesf[i], particlesf[i + cols + 1])); } if (x > 0 && y < rows - 1) { springs.push(new Spring(particlesf[i], particlesf[i + cols - 1])); } } } }
function draw() { background(0, 0, 255); // Update the physics system physics.update(); // Draw springs springs.forEach((spring) => spring.show()); // Draw particles particlesf.forEach((particle) => particle.show());
// Handle mouse interaction if (mouseIsPressed) { if (!selectedParticle) { // Find the nearest particle on mouse press //let particlesT = particlesf.concat(particles2); // in case we would build a second body particles2 we can concatenate both to interact with the mouse // selectedParticle = particlesT.reduce((nearest, p) => { // in case two bodies particlesT instead of particlesf selectedParticle = particlesf.reduce((nearest, p) => { let d = dist(mouseX, mouseY, p.x, p.y); return d < dist(mouseX, mouseY, nearest.x, nearest.y) ? p : nearest; }, particlesf[0]); } // Move the selected particle selectedParticle.lock(); selectedParticle.x = mouseX; selectedParticle.y = mouseY; selectedParticle.unlock(); } else { selectedParticle = null; // Reset when mouse is released }
}
// Particle class extension class Particle extends VerletParticle2D { constructor(x, y, fixed = false) { super(new Vec2D(x, y)); this.r = 6; if (fixed) this.lock(); // Lock fixed particles physics.addParticle(this); this.ltt = letters[int(random(0, letters.length))]; //console.log(this.ltt) }
show() { fill(255); //stroke(255); //ellipse(this.x, this.y, this.r * 2); textAlign(CENTER, CENTER); textSize(35); text(this.ltt, this.x, this.y); } }
// Spring class extension class Spring extends VerletSpring2D { constructor(a, b) { let length = a.distanceTo(b); // Rest length is the initial distance super(a, b, length, 0.08); // Strength of the spring physics.addSpring(this); }
show() { stroke(255, 127); strokeWeight(1); line(this.a.x, this.a.y, this.b.x, this.b.y); } } ```
Tiny Bonus 1: Apply Repulsion and Constrain Velocities
In order to avoid particles to accelerate beyond limits and deform excessively, we will create two functions applyRepulsion and constrainParticleVelocities and apply them to the draw() loop. Note that before adding these two ‘helper’ functions the structure of the scaffolding will deform more easily upon collisions or abrupt manipulations of the particles.
```
// Apply a repulsion force between all particles function applyRepulsion() { let repulsionStrength = 881; // Adjust for stronger or weaker repulsion particlesf.forEach((p1, i) => { particlesf.slice(i + 1).forEach((p2) => { let force = p1.copy().sub(p2); // Correctly use instance methods let distance = force.magnitude(); if (distance > 0 && distance < spacing / 2) { // Repel only within a certain range force.normalizeTo(repulsionStrength / (distance * distance)); // Scale force with inverse-square law p1.addForce(force); // Apply force to p1 p2.addForce(force.scale(-1)); // Apply the opposite force to p2 }
}); }); }
// constrain the particle velocities using current postion and previos position function constrainParticleVelocities() { particlesf.forEach((particle) => {
let dx = particle.x - particle.prev.x; // Change in x, note that prev.x is available in the particle class from the toxiclib let dy = particle.y - particle.prev.y; // Change in y let speed = Math.sqrt(dx dx + dy dy); // Calculate speed
if (speed > MAX_SPEED) { // Normalize and scale down to MAX_SPEED let ratio = MAX_SPEED / speed; particle.x = particle.prev.x + dx ratio; // Adjust x position particle.y = particle.prev.y + dy ratio; // Adjust y position } }); }
// inside the draw loop
... right after physics.update() function draw() { background(0, 0, 255);
// Update the physics system physics.update(); // constrain the velocities of all particles constrainParticleVelocities(); // Apply repulsion forces to prevent collapsing applyRepulsion();
// ... rest of the code for the draw loop
}
... ```
Tiny Bonus 2: Adapting and Modifying the Structure and Shape of the Scaffolding
A small variation to play with modify the spacing algorithmically using the x and y as variables that affect the spacing. Like this, we will get interesting scaffolding arrangements and deformations. We can also experiment with how do we want to connect the particles in the system by modifying the springs connections. I’d recommend to play a bit with that to get a better idea what the frog is going on inside the for loops.
For example this change in the for loop while declaring the particles will cause the deformation visible bellow.
`` // Create a grid of particles with deformation of the spacing based on cols and rows iterations for (let y = 0; y < rows; y++) { spacing+=1.15 // adding 1.15 to spacing on each y iteration for (let x = 0; x < cols; x++) { spacing+=1.75 // adding 1.75 to spacing on each x iteration let particle = new Particle(100 + x spacing, 50 + y spacing, false); particlesf.push(particle); } } ``
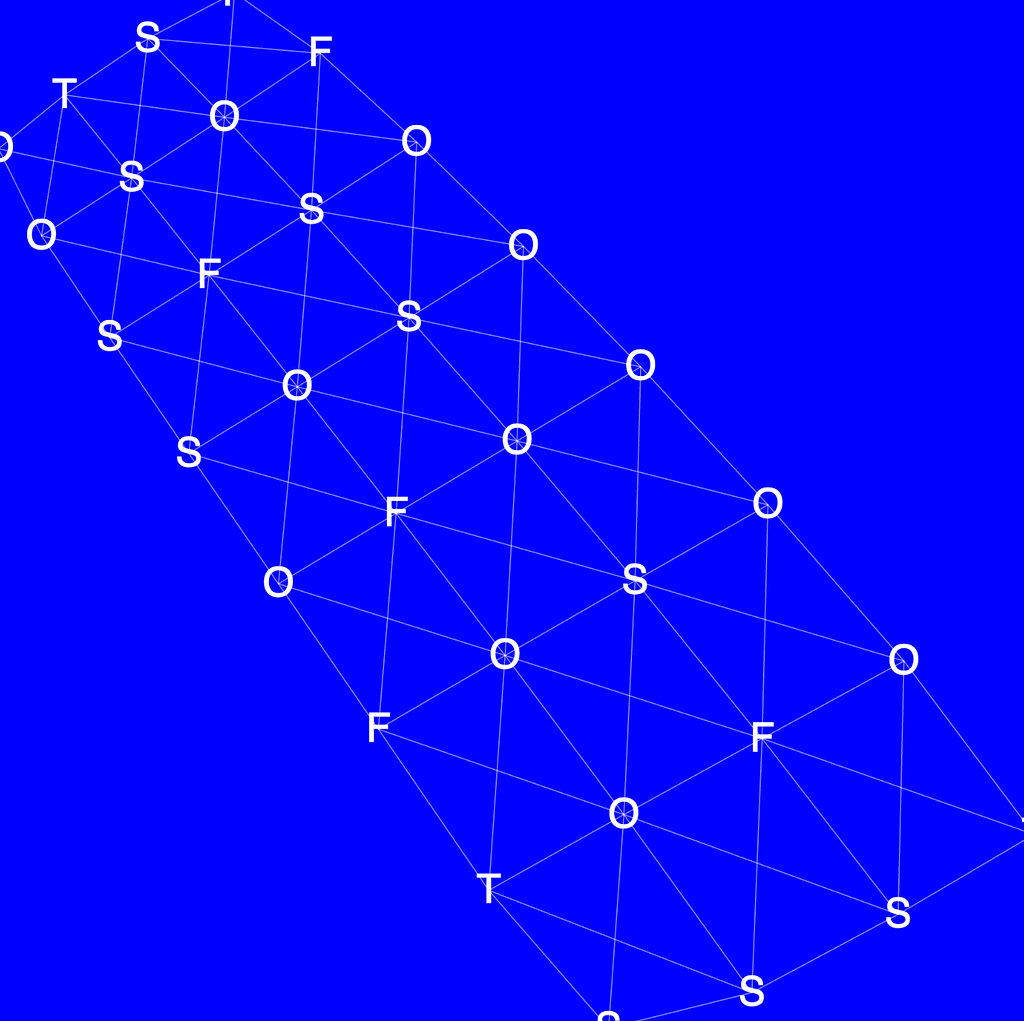
In a further example we create a more radial structure, which looks like an X. Here one bigger area remains open, while other three areas are interconnected. All particles are distributed along some X concentric lines.
``` // alternative structure experiment replace the // center of a radial distribution let centerX = width / 2; let centerY = height / 2;
for (let y = 0; y < rows; y++) { let radius = 50 + y * 30; // Increase the radius for each row let points = cols; // Fixed number of points per circle
for (let x = 0; x < points; x++) { let angle = map(x, 0, points, 0, TWO_PI); // Distribute points around the circle let px = centerX + radius cos(angle); // Polar coordinates to Cartesian let py = centerY + radius sin(angle); let particle = new Particle(px, py, false); particlesf.push(particle); } } ```
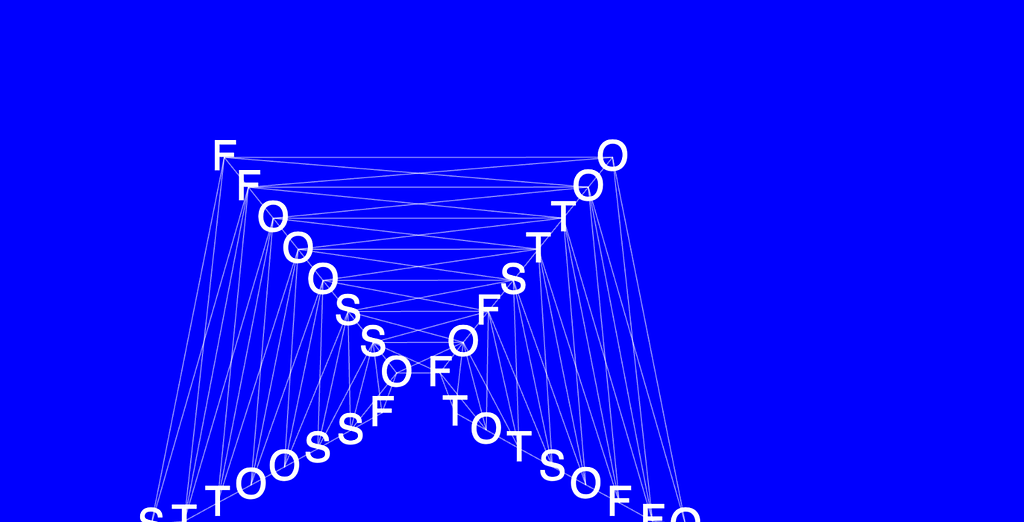
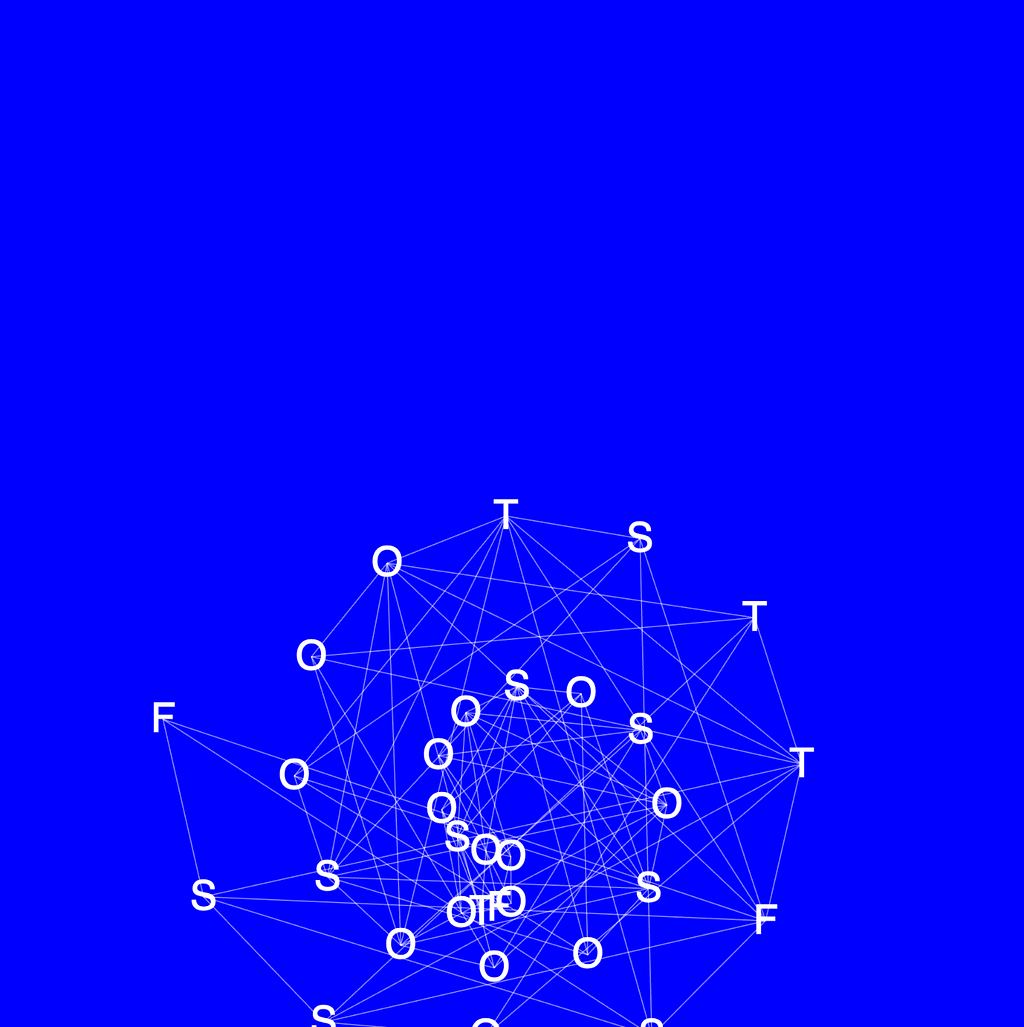
Last example ( I included the code in my repository ) we use a concentric spiral structure. The result is playful visually and structurally. This one is a really good example not only for creating playful and visually appealing experiences, but also testing out structural behaviours and innovating. Remember replacing this part in the initial setup function where we declare the particles and fill in the particles array.
``` let centerX = width / 2; let centerY = height / 2; let angleStep = PI / 6; // Control how tightly the spiral twists
for (let i = 0; i < rows cols; i++) { let radius = i 10; // Gradually increase radius let angle = i angleStep; // Rotate incrementally let px = centerX + radius cos(angle); // Polar coordinates to Cartesian let py = centerY + radius * sin(angle); let particle = new Particle(px, py, false); particlesf.push(particle); } ```
Conclusion and further steps
Awesome, in the next two parts we will elaborate and go through the following topics:
- Soft Body Translation: from Matter JS to P5JS
- Generating a Random Shape and make it into a Soft Body
- Drawing the Outer Layer of the Soft Body using the Convex Hull Algorithm
Great! I hope you enjoyed reading this, you were able to find answers or learn about Soft Bodies, and you can further experiment and learn on your own, and come up with cool stuff.
Access the code for the Toxic Soft Body with a Scaffolding structure with theSooft Studio letters here.
Access the code at my github repository for playWithPhysics with this and more examples. (still a bit messy but it is work in progress).
Follow me, follow Sooft Studio, like this article and share it! It means a lot to us, and helps us to stay motivated to write more walk throughs like this.
Disclaimer: this examples and article were written in its entire majority by myself(Andres) and used LLMs (perplexity and gpt4o) for helping with the code when stuck. This time I didn’t use much the LLMs for correcting the style and grammar, so please bare with my errors.
References
- Newtonian physics and vector statics or mechanics: https://www.youtube.com/watch?v=k1PoAqUQQrs
- Vector Mechanics: Statics https://pdhonline.com/courses/g492/g492content.pdf
- Vectorial Mechanics: https://en.wikipedia.org/wiki/Vectorial_Mechanics
- Example Repository for Soft Body ToxicLibrary Scaffolding: https://github.com/ndr3svt/playWithPhysics/tree/main/examples/sooftBodyToxicLib
- Example in p5js editor for Soft Body ToxicLibrary Scaffolding: https://editor.p5js.org/ndr3svt/sketches/t8Y2bibFT
- Coding Train lesson for Soft Body Character: https://www.youtube.com/watch?v=IxdGyqhppis&t=9s
- Conversation with Perplexity AI for constraining the velocities: https://www.perplexity.ai/search/how-can-i-constrain-the-veloci-psWQGKHGQB67.YbSdN46XQ
Originally published on Medium.